
If you find these instructions helpful please like our Facebook Page.
Fitting instructions for your Antique Fireplace
These instructions are as a guide only or for competent DIYers, we recommend you employ a competent fitter.
Fitting the tiles in your antique fireplace
Before starting the job the first thing I like to do is fit the tiles if the fireplace them so they can set. Begin by standing the fireplace upright and jamming the tiles in with wedges of wood; clothes pegs are very handy for this. Then very gently lay the fireplace down and plaster in with a very thick bonding plaster, spread carefully so as not to disrupt the tiles; you can keep your hand on the front of each tiles in turn to hold it steady and check for movement. The purpose of plastering the tiles in is not just to secure the tiles but also to block any gaps around the tiles, tiles trays and racks to prevent smoke and gas leaking through. Leave the fireplace for a couple of hours to allow the plaster to set; you can even plaster them in the day before. A word of caution though; after a short time lift the fireplace up and check that the tiles are straight, if they are not push them into position, the plaster may be firm but not set –
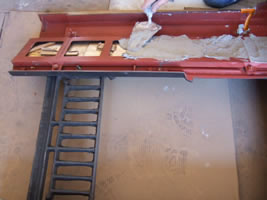
Wedge the tiles in position and plaster in
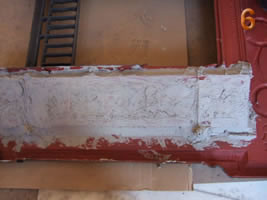
Tiles fixed with plaster
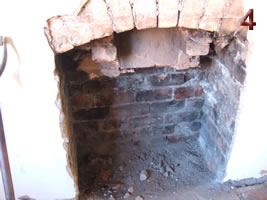
Knocking out the existing fire back
Before fitting your fireplace you must first remove any existing fireplace or back –
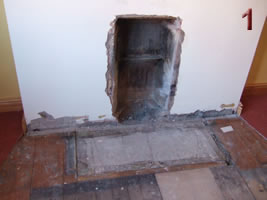
Remove existing fireplace and fire back
BE WARNED THIS IS VERY DUSTY. If possible the room should be emptied as the dust gets everywhere, good ventilation is highly recommended.
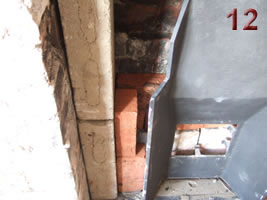
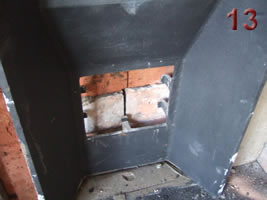
At first glance the opening may look small and original but it is usually hiding a much larger opening. It is often tempting to leave the existing fireback in but you are only putting off the inevitable, it’s often faster to knock it all out and then brick up.

Knock out brickwork – Fitting an Antique Fireplace
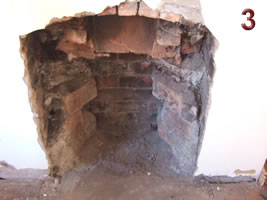
Knock out brickwork
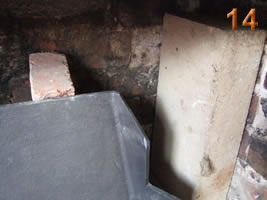
Original Brick Archway
The last picture above shows the original arched opening indicating that the original fireplace was quite large, this particular opening is 42” high but because the tile carriers on the fireplace we are fitting are also 42” plus 2” for the hearth, we will need to adjust the opening. We could chisel away at the arch but we were concerned that the vibration may loosen the stack so we have chosen to gently remove the arch and fit a steel reinforced concrete lintel. These are the same depth as a common brick and the length can be easily cut to size with an angle grinder. Once in place brick up where necessary getting plenty of mortar between the gaps. Don’t worry about being to neat, nobody will see it!
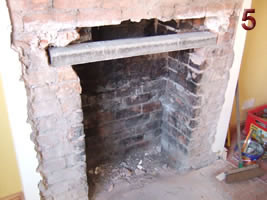
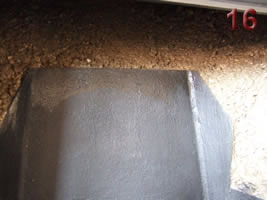
Reinforced concrete lintel
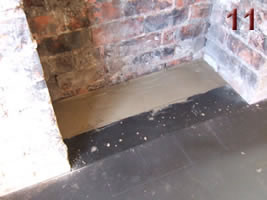
Laying the hearth
The hearth we are laying is slabbed matt granite which is made up in one piece and makes life a lot easier, it is essential that this is laid level, if it isn’t your fireplace will look wonky.
I like to have a slight gradient running back into the fire so that anything falling out of the fire will hopefully roll back. This hearth has a separate lip because of the shape of the tiles but it isn’t necessary with all fireplaces. Once the hearth is fitted fill and level the back of the fire opening with a good concrete mix. This is going to have hot ash falling onto it and will also carry the weight of the fire back.
Laying the hearth
Laying the hearth – Fitting instructions
Level the back of the hearth with a concrete mix – Fitting instructions
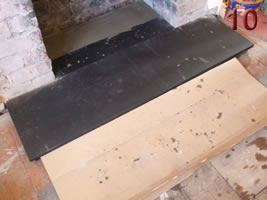
Level the back of the hearth with a concrete mix
Fitting the fire back
This fireplace has a separate fire back but if you are fitting a fireplace with the back attached you will still need to follow the instructions for bricking up but you will first have to chalk out roughly where the finished position of the back will be and then remove the fireplace to enable you to brick up behind.
Place the fire back in position putting it roughly where you think it will be then offer the fireplace up, checking that the fireplace is central on the wall and hearth. When you are happy that everything is in the correct position pull the back forward gently until it touches the fireplace, then mark its position in the wet concrete. At this point you should also mark the position of the fixing lugs with a drill. You now need to fill in behind the fire back with bricks or blocks if there is a lot of space behind.
Brick up behind the fire back
Brick up behind the fire back
Brick up behind the fire back
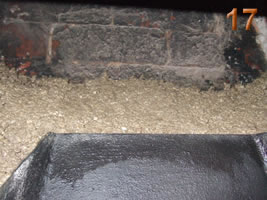
It is important to leave a 2” gap between the bricks and the fire back to allow for any mistakes and to back fill with vermiculite; this can be purchased from most builder’s merchants. Continue bricking up to the top of the fire back, the bricks at the top need feathering back, these will be covered with vermiculite to form a slope which will enable the soot to fall down the chimney and into the grate, there shouldn’t be a ledge for it to gather on as a collection of soot can cause a chimney fire.
At this point you need to consider if your fireplace has a vent plate, this needs enough room to operate so you will need to keep the finished level below this.
Fill below the vent/damper plate
You can now fit the fireplace using rawl plugs and screws at least 2” long.
Fix to the wall
The fireplace should be fitted onto the wall free of plaster. It is then important to plaster in to form an air seal. In our case the plaster is well clear of the fireplace and will be re-plastered later.
Some fireplaces have nibs on the legs, which you can accommodate by drilling holes in the hearth, alternatively you can remove them.
Once you have fastened the fireplace to the wall you can now fill the gap between the fire back and the bricks with a vermiculite mix; five parts vermiculite to one part cement, add water to form a semi-dry mix. I usually do this filling in by hand.
Fill behind with vermiculite
Fill behind with vermiculite

Fill behind with vermiculite
Once in position and set the vermiculite will help hold everything together, it will also keep the heat in where you want it and also help protect your fireback.
The fireback should now be touching the fireplace front, which is fine, it is not necessary for the two to form an airtight seal, the fireback gets very hot and expands so a slight gap is desirable. There should never be a gap at the rear of the fireback as it can cause turbulence and make for a poor fire, it will also collect soot, which can be dangerous and smells nasty.
All that’s left now is to clean everything paying particular attention to any cement or plaster that may be on the fireplace.
All done.
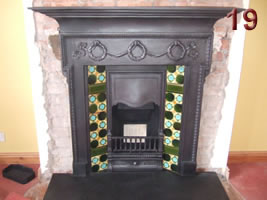
All done!
Fitting a tiled insert and surround
The above instructions are for combination fireplaces; if you are fitting an insert and separate surround the instructions are the same with regards to bricking up and filling in behind the fireplace.
The difference is that your insert will not be fitted flush to the wall but will be set off the wall; the gap depends on the rebate of your fireplace, most commonly 1”.
You will need to create a seal around the edge of the insert; to achieve this once you have the insert fixed at the correct distance from the wall you can use wire or plasterers edging to push down the gap all around the edge and then fill on top with bonding plaster. The wire is just to hold the plaster until it sets. You can then screw your surround to the wall.
Good Luck!!